 (on the top-right corner of the CloudEndure User ConsoleCloudEndure SaaS User Interface. A web-based UI for setting up, managing, and monitoring the Migration and Disaster Recovery solutions.) and select Manage Users .
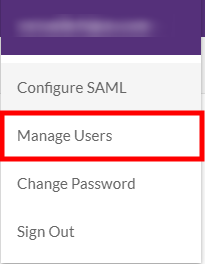

Important! The information provided in this section is for general Troubleshooting guidance only. The information is provided on "AS IS" basis, with no guarantee of completeness, accuracy or timeliness, and without warranty or representations of any kind, expressed or implied. In no event will CloudEndure and/or its subsidiaries and/or their employees or service providers be liable to you or anyone else for any decision made or action taken in reliance on the information provided above or for any direct, indirect, consequential, special or similar damages (including any kind of loss), even if advised of the possibility of such damages. CloudEndure is not responsible for the update, validation or support of troubleshooting information.
AccountThe entity that signed up with CloudEndure. Admins can create new Users by inviting a User to join your AccountThe entity that signed up with CloudEndure..
1. Open the User Menu (on the top-right corner of the CloudEndure User ConsoleCloudEndure SaaS User Interface. A web-based UI for setting up, managing, and monitoring the Migration and Disaster Recovery solutions.) and select Manage Users .
2. Invite new Users by clicking on INVITE NEW USERS. 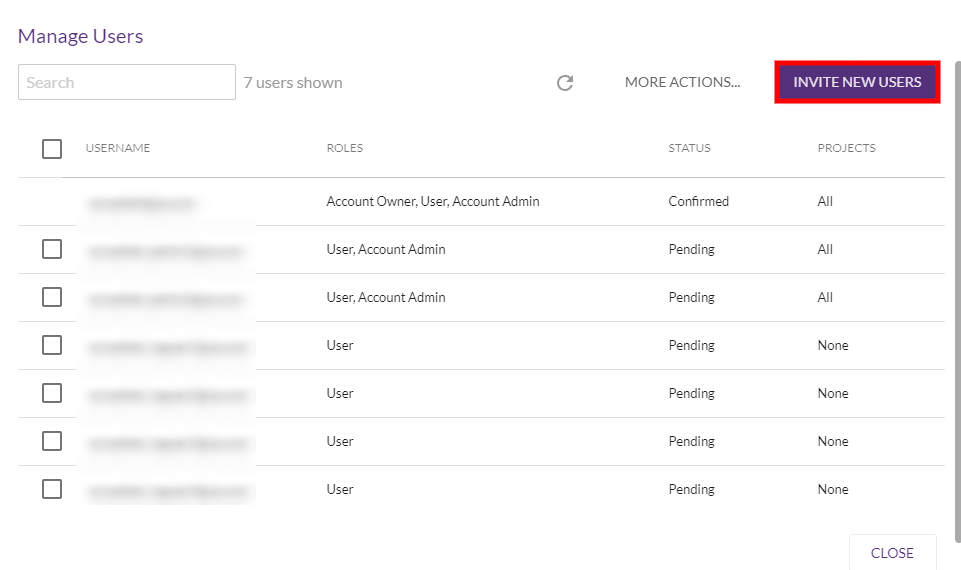
3. The Invite User dialog will open. Input the email of the User you want to invite and click INVITE USER.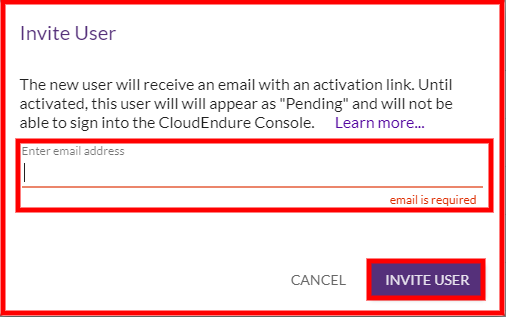
4. The top-right hand corner of the Console will display a confirmation that the invitation was sent.

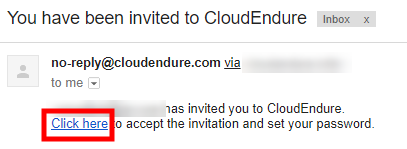
5. The invited User will receive an email with an activation link.
Note: The email link is valid for a single use and expires after one week. You can re-invite Users at any time by using the Re-Invite option in the MORE ACTIONS menu.
Sample Email
6. Once the User has accepted their invitation, the User must set a password. The password must be at least eight characters long and must contain at least one lowercase letter, one uppercase letter, one number, and one of these special characters: !@#$%&*"
Note: The User is not confirmed and cannot sign into the User Console until a password is set.
7. Each User must set a password, confirm it, and click SET PASSWORD. 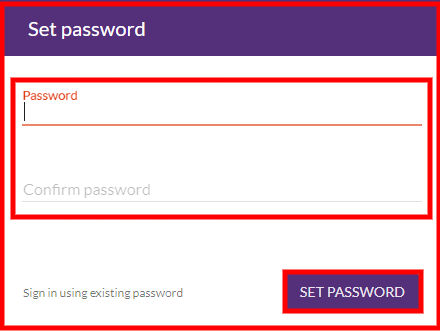
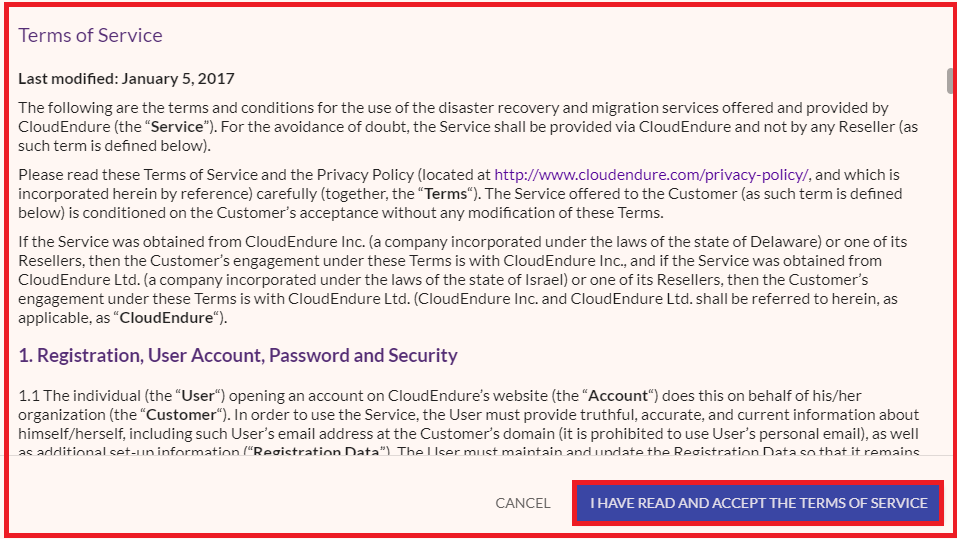
8. After setting the password, the user will be prompted to sign in. Upon signing in for the first time, the User will be asked to accept CloudEndure's Terms of Service.
9. Once a User has set a password, that user will show as Confirmed under the STATUS column. 
10 .Users that have not activated their account by clicking the email link and setting the password will appear as Pending under the STATUS column of the Manage Users dialog.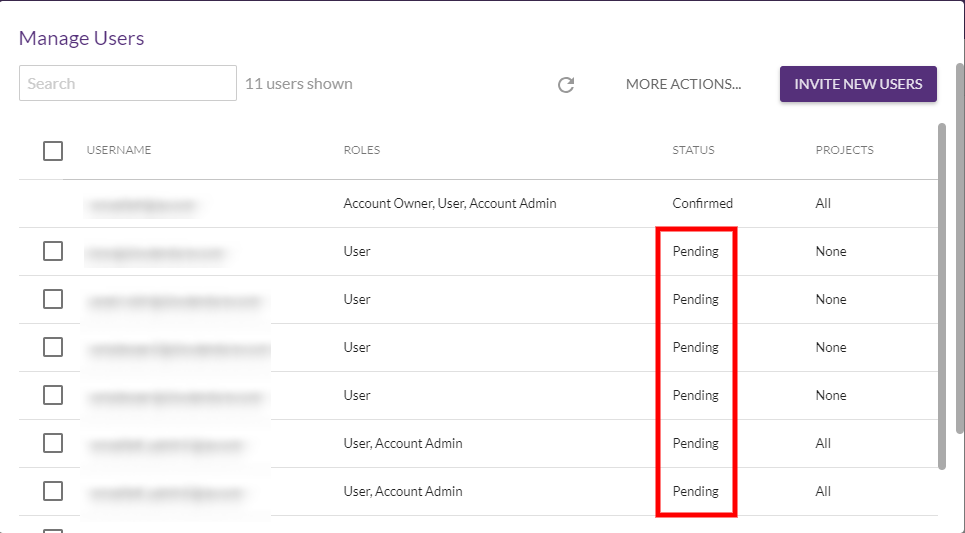
To assign Users to ProjectsA Project is the basic organizational unit for running a CloudEndure solution. or remove Users from ProjectsA Project is the basic organizational unit for running a CloudEndure solution., first select the Users you want to assign or remove by checking the box to the left of the username, then open the MORE ACTIONS menu and select Assign/Remove Users To/From Projects. 
The Assign Selected Users to Projects dialog will appear. Check the box to the left of each ProjectA Project is the basic organizational unit for running a CloudEndure solution. you want to assign the user to. Uncheck the box for the ProjectsA Project is the basic organizational unit for running a CloudEndure solution. from which you want to remove the Users. Click APPLY CHANGES to save the changes. 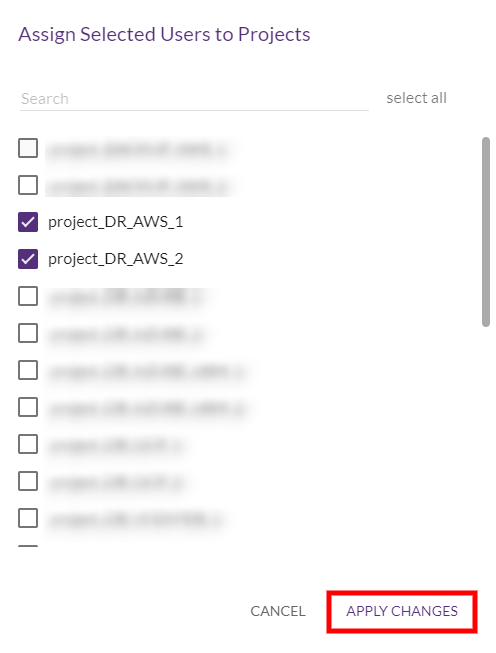
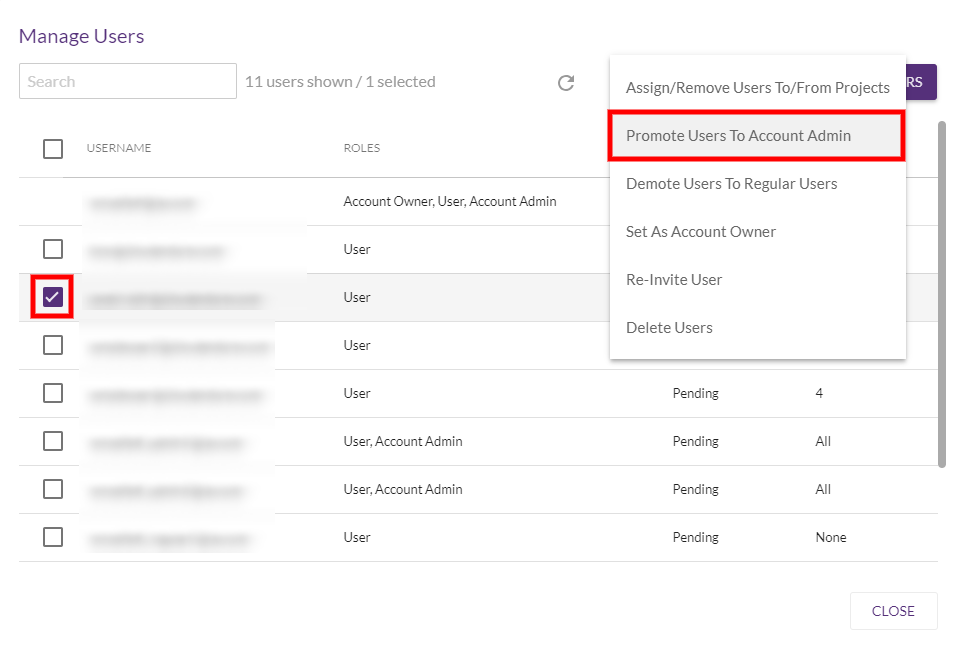
To promote Users to the Account AdminThe User type that has full User management and Project control. role, first select the Users you want to promote by checking the box to the left of the username, then open the MORE ACTIONS menu, and select Promote Users to Admin.
The Promote Users to Account Admin Role dialog will appear. Click OK to confirm the promotion. 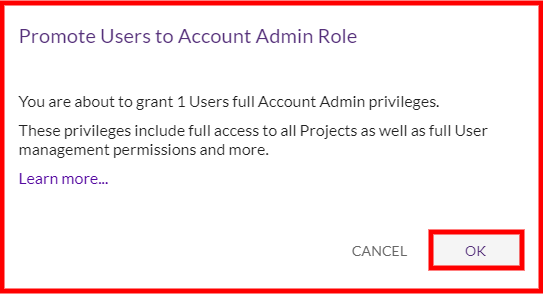
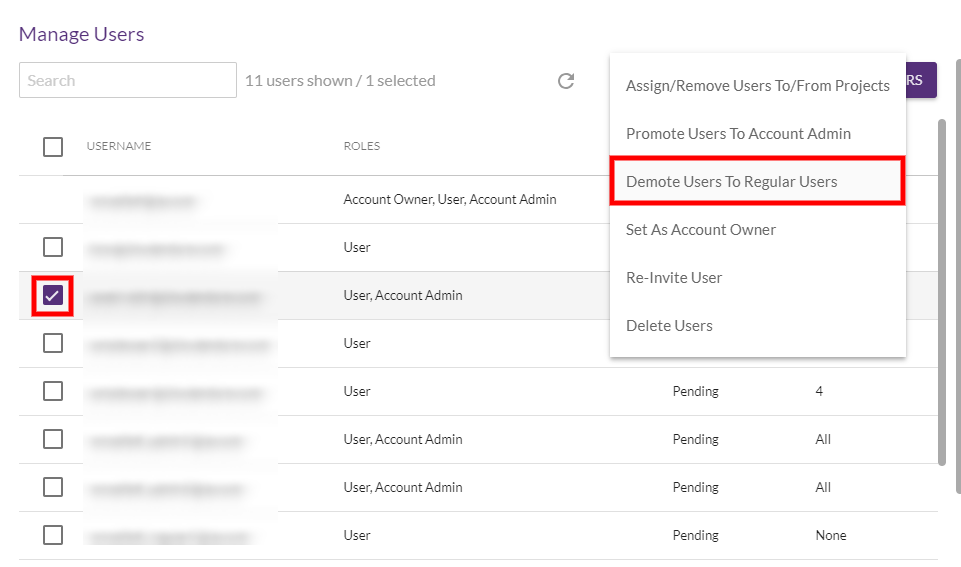
To demote Users from the Account AdminThe User type that has full User management and Project control. role to regular Users, first select the Users you want to demote by checking the box to the left of the username, then open the MORE ACTIONS menu, and select Demote Users to regular Users.
The Demote to regular Users dialog will appear. The selected Users will have their administrator privileges revoked and will be demoted to regular Users.
Click OK to confirm the demotion. 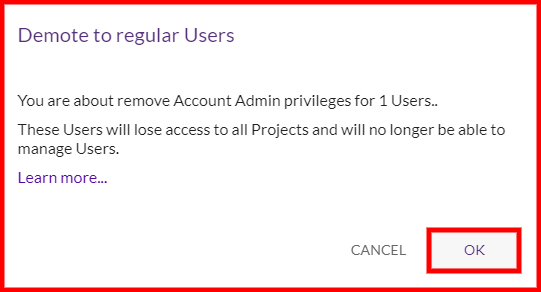
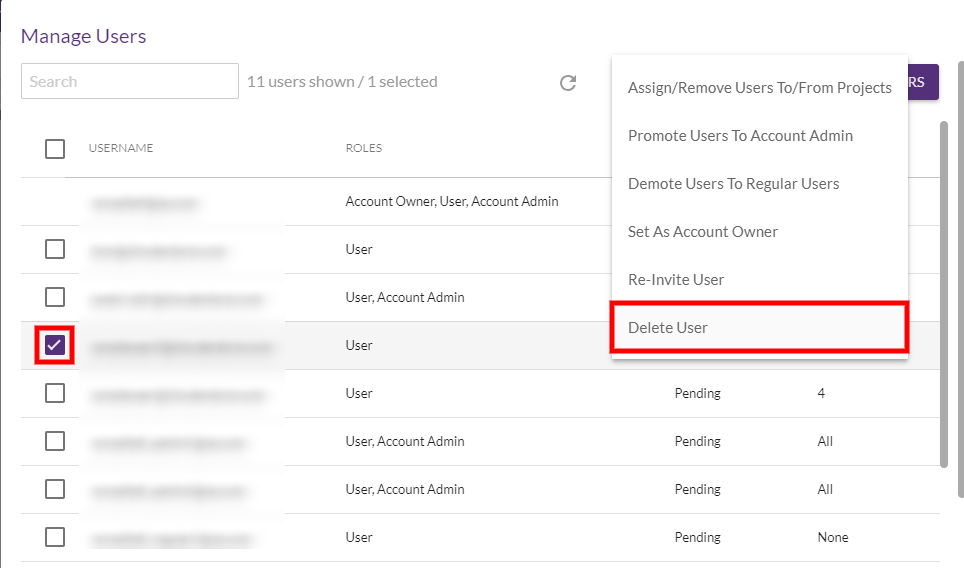
To delete a User, select the a single User that you want to delete by checking the box to the left of the username, open the the MORE ACTIONS menu, and select Delete User.
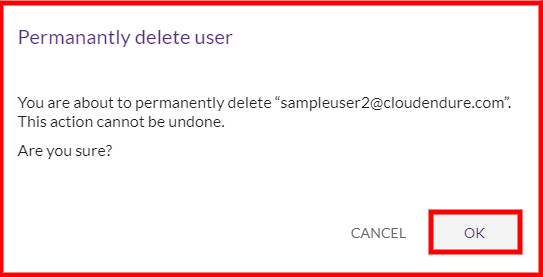
The Permanently Delete Users dialog will appear. The selected User will be permanently deleted from your AccountThe entity that signed up with CloudEndure..
Click OK to confirm the permanent deletion of the User.
©2020 COPYRIGHT CloudEndure - Terms of Service - Privacy Policy - AWS Vulnerability Reporting Guidelines - Report a Security Issue